Cool and dry are not the same thing. That single mix-up is responsible for more ruined hiking boots than bad trails ever were. A basement in Georgia or a hall closet in Florida can sit at a pleasant 65°F all year round while the relative humidity inside hovers at 70% or higher. The temperature feels fine to the touch. The air itself is a slow-motion mildew incubator.
I moved from a dry western state to a coastal humid one a few years back, and my storage routine — which had worked perfectly for a decade — fell apart within one off-season. Two pairs of leather boots came out in spring with a fine gray-green bloom across the uppers and a smell that no amount of airing out would fix. That failure forced me to rebuild my entire storage approach from scratch, and what follows is the version that has held up through four humid summers since.
Rather than walking through this as a simple checklist, I want to go at it from the angle of the assumptions that get people into trouble in the first place. Most bad storage habits come from advice that works fine in a dry climate and quietly fails in a wet one.
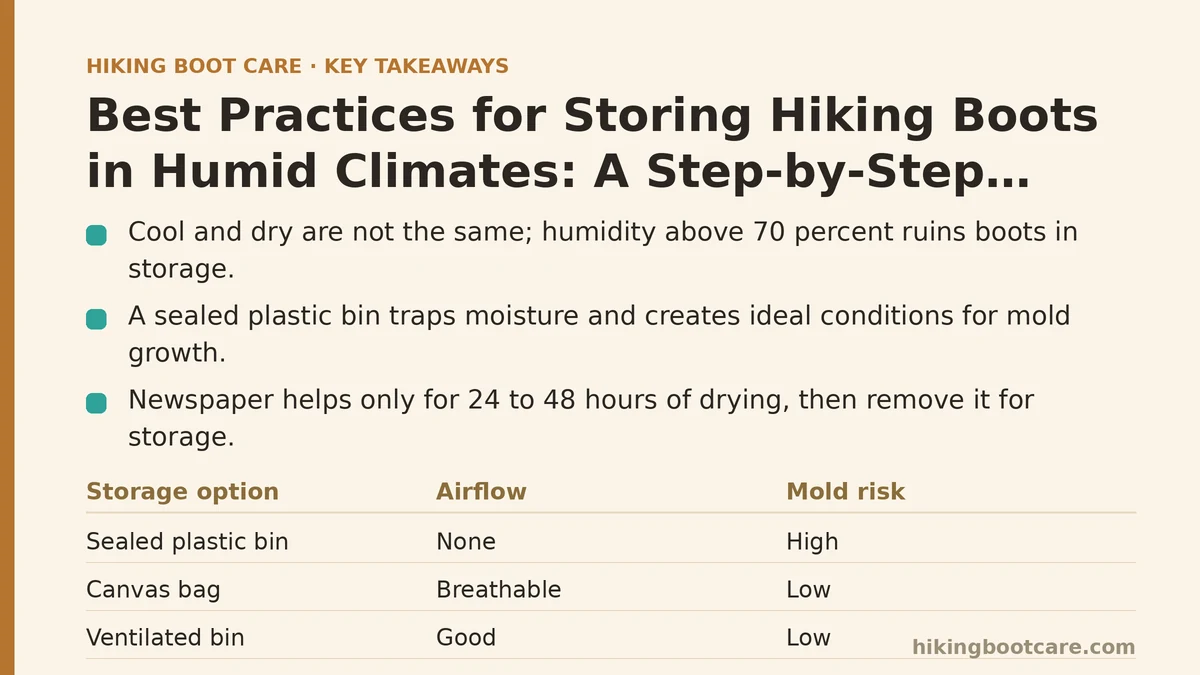
Myth: A Sealed Plastic Bin Is the Safest Place to Store Boots
This is the single most common mistake I see, and it comes from good intentions. A sealed bin keeps out dust, bugs, and light, so it feels protective.
In a humid climate, a sealed plastic bin is closer to a greenhouse than a safe. Any residual moisture in the boots — and there is almost always some, even after they look dry — has nowhere to go. It just recirculates inside that closed container, month after month, at whatever ambient temperature the space happens to hold. Add organic material like leather, foam, and glue, and you have created near-ideal conditions for mold growth.
Reality: boots need airflow far more than they need protection from dust. A breathable option — a canvas storage bag, an open shelf, or a bin with ventilation holes drilled into the sides — lets residual moisture escape gradually instead of condensing back onto the boot surface.
Myth: Stuffing Boots with Newspaper Solves the Moisture Problem
Newspaper is a legitimate short-term drying tool. Right after a wet hike, balled-up newspaper inside the boot pulls moisture out of the interior lining faster than air-drying alone.
The confusion happens when people treat newspaper as an ongoing storage solution rather than a one-time drying step. Left inside a boot for months, that same newspaper becomes inert. It has already absorbed what moisture it could hold, and in a humid environment it can reabsorb ambient moisture from the air and hold it directly against the boot lining — the opposite of what you want.
Reality: use newspaper for the initial 24 to 48 hours of drying after cleaning, then remove it. For the actual storage period, switch to something with ongoing moisture-absorbing capacity, such as silica gel packets or a small container of DampRid placed inside each boot. These continue pulling humidity out of the immediate air pocket around the boot for weeks rather than saturating once and stopping.
Myth: Conditioning Leather Heavily Before Storage Protects It
Conditioning leather before a long break from hiking sounds like sound maintenance, and in a dry climate it generally is. Oils and waxes replace what evaporates during storage, keeping the leather supple.
In a humid climate, heavy conditioning right before storage introduces a problem: many conditioners are oil-based, and oils are food for mold spores. A heavily oiled leather boot sitting in warm, moist air for four or five months is a better breeding ground than a lightly conditioned one. A useful comparison is two identical pairs of leather boots stored side by side — one lightly conditioned, one heavily saturated with wax the night before storage. The heavily waxed pair developed visible mold spotting in the crease lines within ten weeks. The lightly conditioned pair did not.
Reality: apply a thin, even layer of conditioner and let it fully absorb — ideally a full day before boots go into storage. Skip conditioning entirely if you plan to store boots for more than six months, and instead apply a fresh coat right before the boots come back into rotation.
Myth: Any Closet Counts as “Indoor” Storage
There’s an assumption that anything inside the house is automatically safer than a garage or shed. That’s often true for temperature swings, but not for humidity.
Interior closets without airflow, especially ones on exterior walls or above crawl spaces, frequently run at higher humidity than the rest of the house because they lack air circulation. Closets that stay shut with no vent can easily sit 10–15 percentage points higher in relative humidity than the adjoining room.
Reality: location matters less than airflow and elevation. Boots should sit on a shelf or rack, off the floor, in a space where air can move past them — even if that means leaving a closet door cracked or adding a small closet dehumidifier. A cheap hygrometer, the kind sold for under $15, is worth placing in your storage space so you know the actual humidity rather than guessing based on temperature.
Myth: A Musty Smell Means the Boots Are Ruined
Finding mildew smell on boots you pulled out of storage feels like a death sentence for the pair, especially if this is the first time it has happened. It isn’t, in most cases.
Surface mildew on leather or fabric can usually be treated with a diluted vinegar-water wipe-down (roughly one part white vinegar to four parts water), followed by a full air-dry in sunlight, which has natural antimicrobial effect. For synthetic boots, a mild antibacterial cleaner formulated for gear works the same way. The smell typically lifts within a day or two of proper treatment.
Reality: a musty smell is a warning about your storage environment, not necessarily a verdict on the boots. If it keeps recurring after you’ve cleaned and dried them thoroughly, the problem is systemic — insufficient airflow, a humid storage location, or boots that went into storage while still slightly damp inside. Treating the smell without fixing the environment just means you’ll be treating it again next season.
The Actual Step-by-Step Storage Process
Once the myths are out of the way, the process itself is straightforward. This is a common sequence to follow at the end of every hiking season.
- Clean thoroughly. Remove all dirt, mud, and trail residue with a pH-neutral cleaner and a soft brush. Anything organic left on the surface is potential mold food.
- Dry completely before storage. Air-dry at room temperature for at least 48 hours. Never store boots that feel even slightly damp inside, and never speed-dry with direct heat right before storing — that can crack the material without you noticing.
- Apply a light conditioner, not a heavy one, if the boots will be stored for under six months. Skip it for longer storage.
- Remove the insoles and store them separately, laid flat. Insoles trap moisture against the boot’s interior and are one of the most common hidden sources of mildew.
- Insert moisture absorbers. Silica gel packets or a small DampRid container inside each boot, replaced or refreshed every one to two months during long storage.
- Loosely stuff with acid-free tissue paper or a breathable shoe form to help the boot hold its shape without trapping moisture the way tightly packed newspaper can over time.
- Store on a shelf or rack, elevated off the floor, in a well-ventilated space — not a sealed bin, not a garage floor, not a damp basement corner.
- Check monthly. In a humid climate, a quick monthly check for smell, discoloration, or surface moisture catches problems before they become structural.
Storage Method Comparison
| Storage Method | Airflow | Humidity Risk | Recommended in Humid Climates? |
|---|---|---|---|
| Sealed plastic bin | None | High | No |
| Ventilated bin or breathable bag | Moderate to good | Low | Yes |
| Open shelf, no cover | High | Low, but exposed to dust | Yes, with a dust cloth |
| Cardboard box | Low | High (cardboard absorbs and holds moisture) | No |
| Closet with door shut, no vent | Low | Moderate to high | Only with a dehumidifier added |
| Garage or shed | Variable | High, especially seasonal | No, unless climate-controlled |
Where This Actually Matters Most
Humid-climate storage habits matter more for leather and full-grain boots than for synthetic ones, simply because leather is an organic material that mold can use as a food source. Synthetic boots are more forgiving, but they aren’t immune — glue bonds and foam midsoles can still degrade faster in persistent humidity, even if mold isn’t the visible symptom.
If you live somewhere humid year-round rather than seasonally, it’s worth treating this as a permanent part of your gear routine rather than a one-time fix before a long trip away. A small closet dehumidifier or a rotating supply of silica packets costs very little compared to replacing a pair of boots that mildewed past the point of salvage.
What does your current storage setup look like — a closet, a mudroom, a garage shelf? If you’re not sure whether it’s humid enough to cause problems, a $10 hygrometer left in that space for a week will tell you more than guessing ever will. Related guides: Best Hiking Boot Storage Solutions for Small Apartments, A Beginner’s Step-by-Step Guide to Conditioning Leather Hiking Boots, and Best Tips for Packing and Traveling With Hiking Boots.