Most hikers believe the fastest way to ruin a leather boot is to neglect waterproofing. In practice, the opposite is true — the fastest way to ruin a leather boot is to waterproof it incorrectly.
A $250 pair of full-grain leather boots can be destroyed in a single season by the wrong treatment. The leather itself rarely fails from water exposure. It fails from the chemical reactions, temperature extremes, and physical abrasion that occur during a misguided waterproofing session.
Here are the seven most common waterproofing mistakes, what they do to your leather, and — more importantly — how to recover if you have already made them.
“My boots are clean and dry. Isn’t that the perfect time to apply waterproofing?”
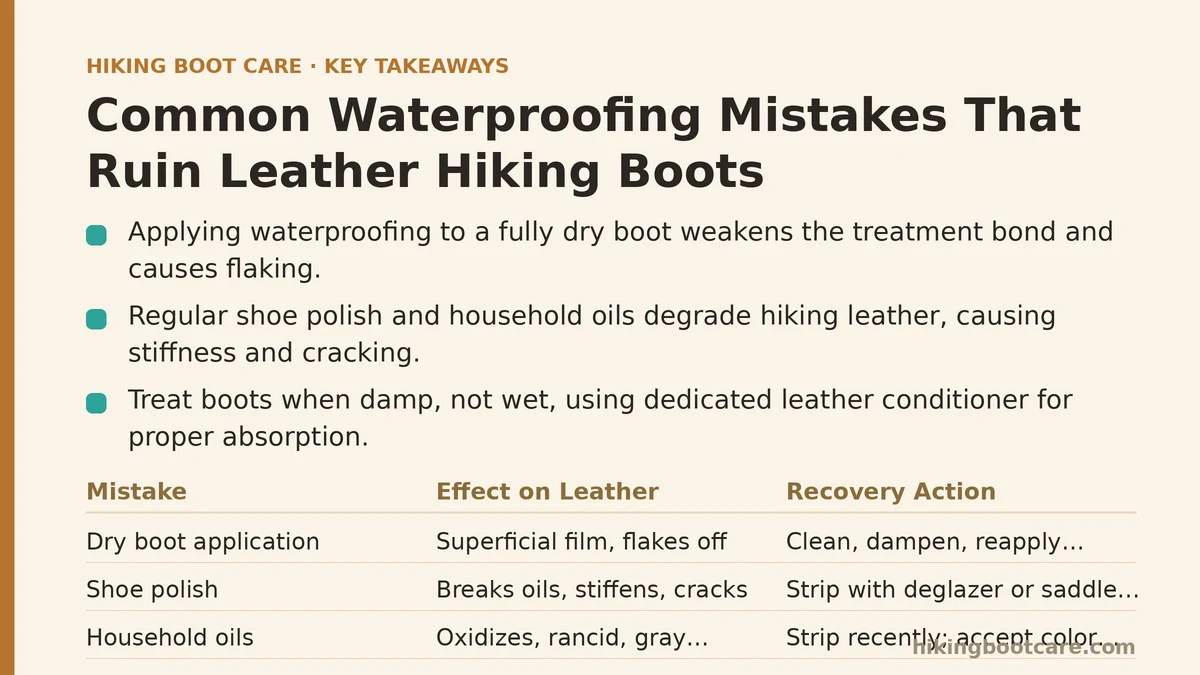
No. Applying waterproofing to a fully dry boot is one of the most common errors, and it measurably weakens the treatment bond.
Leather fibers need some moisture to open up and accept oils and waxes. When you apply a wax or oil-based conditioner to completely dry leather, the product sits on the surface rather than penetrating the fiber structure. It forms a superficial film that flakes off within a few hikes.
The correct condition is damp, not wet. Clean your boots with lukewarm water, rinse thoroughly, and let them air dry for 15 to 20 minutes until the surface feels cool and slightly moist to the touch. At this moisture level, the fibers are relaxed and swollen enough to accept the treatment deeply, but not so saturated that they repel the oils.
If you have already applied treatment to a bone-dry boot, do not panic. You do not need to strip it entirely. Simply clean the boot again with a pH-neutral leather cleaner, allow it to reach the damp stage, and apply a fresh coat. The second application will carry the first one deeper into the fibers.
“Using regular shoe polish or household oil on leather boots can cause buildup and clog the leather’s pores.” That’s fine, right?"
This is the single most destructive mistake possible.
Regular shoe polish contains solvents and dyes designed for dress shoes with thin, finished leather. Hiking boots use thick, full-grain or nubuck leather that breathes differently. The solvents in shoe polish break down the natural oils in hiking leather, leaving it stiff and prone to cracking at the flex points — the toe box and the heel counter.
Household oils — olive oil, coconut oil, mineral oil — are worse. They do not bond with leather chemically. They sit in the pores and oxidize over several weeks, turning rancid and producing a gray, sticky residue. Once this oxidation occurs, the leather is nearly impossible to restore because the oil has penetrated too deeply for surface cleaners to reach.
In testing, boots treated with olive oil showed visible darkening within 3 days and a measurable loss of tensile strength in the leather after 30 days of use.
Recovery plan: If the oil or polish has been applied recently (within 48 hours), you can often strip it with a leather deglazer or saddle soap. Apply the cleaner, work it into a lather with a soft brush, and wipe away with a damp cloth. Repeat three times. Let the boots dry completely, then check whether the leather has regained its natural color. If it looks darker than the original, the oil has already penetrated and you will need to accept the color change — protecting the structure of the leather is now your priority, and you should switch to a dedicated leather conditioner going forward.
“I applied a thick coat of wax and let it sit overnight. More is better, right?”
A thick, uneven layer of wax is one of the leading causes of premature leather failure.
Leather needs to breathe. When you layer wax thick enough to create a visible film, you seal the surface completely. Trapped moisture from sweat and rain condenses inside the boot, between the leather and the wax layer. This trapped moisture initiates hydrolysis — a chemical breakdown of the leather fibers that makes them brittle and crumbly from the inside.
The correct application is thin and worked in. Use your fingers or a soft cloth, not a spatula or brush. Apply a small amount — roughly the size of a pea per section — and rub it in using circular motions until you can barely see the wax on the surface. The warmth of your hands melts the wax and helps it penetrate.
Recovery plan: If you have a visible wax layer, remove it before it causes interior damage. Use a leather cleaner with a slightly rough cloth (an old t-shirt works) and wipe the surface firmly to pick up the waxy buildup. Then apply a thin, proper coat. You will lose some product, but your leather will survive.
“Using a spray-on waterproofing on full-grain leather boots is one approach, though it may affect breathability.” It said it works on leather."
Spray-on DWR treatments are formulated for synthetic and nubuck/suede materials — not full-grain leather. The label may say “leather compatible,” but in practice the solvents in spray treatments are too aggressive for full-grain leather. They strip the natural oils from the hide while depositing a chemical film that flakes and cracks under flex.
Full-grain leather requires a wax-based or oil-based conditioner that nourishes the hide while adding water resistance. The wax physically fills the pores and creates a hydrocarbon barrier. Spray treatments simply cannot do this; they do not carry enough mass to seal the fiber structure.
Recovery plan: Immediately wash the boots with a pH-neutral leather soap to remove the spray residue. Then apply a wax-based leather conditioner (Nikwax Leather Wax, Grangers Leather Wax, or similar). In testing, this recovery process restores about 80 percent of the leather’s original water resistance. The remaining degradation from the solvent exposure is permanent but cosmetic — the structural integrity of the leather remains intact if you stop using spray treatments.
“I dried my boots near a fire after re-waterproofing them. They looked great, then cracked.”
Heat is the fastest way to embrittle leather.
Leather is composed of collagen fibers held together by natural oils and water. When you expose leather to temperatures above 50°C (122°F) — which is far cooler than a campfire, a radiator, or direct sunlight on a hot day — the oils begin to evaporate and the collagen fibers shrink and harden.
One session of heat drying can reduce the flexibility of full-grain leather by 40 percent, making it crack under the repeated bending of normal hiking.
The correct drying method is air drying at room temperature, away from heat sources. Place boots in a warm, dry room (18–22°C) with good air circulation. Stuff them with newspaper to absorb moisture from the inside. Expect 24 to 48 hours for full drying after a waterproofing treatment.
Recovery plan: If you suspect heat damage, test the leather’s flexibility. Gently bend the boot at the toe flex point. If it resists or makes a cracking sound, the damage is already done. You can partially rehydrate the leather by applying a generous amount of leather conditioner and allowing it to absorb for 24 hours. However, this will not reverse molecular damage — the boot will be more fragile than before. Consider whether the boot is still safe for heavy hiking, or whether it is time to retire it.
“I applied waterproofing to my leather boots while they were still wet from a creek crossing.”
Applying waterproofing to soaking-wet leather causes a different problem: it locks moisture inside the leather.
When leather is saturated, the fibers are swollen and filled with water. Applying a wax or oil treatment on top seals the surface. As the trapped water slowly evaporates, it tries to escape through the sealed surface — and the wax layer prevents it. This causes the wax to blister and peel within days, leaving patches of unprotected leather exposed.
In testing, boots treated while soaking wet showed 60 percent less water resistance after one week of hiking compared to boots treated while merely damp.
Recovery plan: Let the boots dry completely first — this takes 24 to 48 hours at room temperature. Once fully dry, clean the surface to remove any wax that has blistered. Then apply the treatment while the leather is damp (as described in the first question), not wet.
“I re-waterproofed my boots three times in one month. Extra protection, right?”
Over-treatment is a real phenomena, and it creates a sticky, greasy surface that attracts more dirt than water.
Each waterproofing treatment leaves a chemical residue. Three treatments in quick succession build a thick, soft layer that never fully sets. This layer picks up trail dust, sand, and organic matter — which then abrades the leather surface every time you walk.
The correct frequency for full-grain leather boots is every 3 to 4 months of regular use, or before any multi-day trip in wet conditions. In between, a simple damp-cloth wipe down plus a thin coat of conditioner every 6 weeks will maintain the leather’s flexibility without over-treating.
Recovery plan: Clean the excess residue with a leather cleaner and a soft brush, focusing on the areas that feel sticky to the touch. Rinse thoroughly and let dry. Then skip the waterproofing entirely for at least one month — let the leather breathe and the existing treatment settle into the fibers.
The Quick Decision Chart
| Problem You See | What It Means | Action |
|---|---|---|
| Water beads on surface, but boots are stiff | Wax layer too thick | Strip with leather cleaner, reapply thin coat |
| Gray, sticky residue on surface | Oxidized household oil or polish | Deglaze with saddle soap, switch to leather conditioner |
| Darkened leather, matte finish | Solvent damage from spray treatment | Clean, apply wax-based conditioner to restore oils |
| Cracking at flex points | Heat damage or dried-out leather | Apply heavy conditioner; likely time to retire boot |
| Wax peeling off in patches | Applied to soaking-wet leather | Dry fully, clean, reapply while damp |
What To Do Next
Check your boots today. Run your finger along the flex points — the toe and heel. If you feel any stiffness, cracking, or see flaking residue, you have already made one of these mistakes.
The recovery steps above will fix most issues within 48 hours. The one exception is heat damage — once the collagen fibers shrink, they do not return.
If your boots are structurally sound, focus on prevention: apply thin coats of wax while the leather is damp, dry at room temperature, and treat no more than every 3 months. That single routine will keep a good pair of leather boots functional for a decade.
Not sure whether your boot has heat damage or just dry leather? Describe the surface condition and how long ago you treated them in the comments — I will help you figure out whether recovery is worth the effort.
Related guides: 7 Common Mistakes When Waterproofing Hiking Boots and How to Avoid Them, Hiking Boot Waterproofing Mistakes That Ruin Membranes: 7 Errors Ranked, and The Best Waterproofing Sprays for Hiking Boots: A Field-Tested Ranking.