Say you are trying to get a soaked pair of boots ready for a morning start. You came off the trail at dusk, the boots are heavy with water, and you need them dry by 7am. The fastest options — a radiator, a hairdryer, an oven on low, or the back seat of a hot car — are also the options most likely to leave you with boots that are a half size smaller, stiff as cardboard, or split at the rand. The damage usually does not show up until the next trip, when the leather has already tightened and the midsole has already begun to separate.
Drying is the part of boot care where good intentions cause the most permanent harm. Heat and speed are the enemies. Below is a breakdown of the most common drying myths, why each one damages boots, and what to do instead.
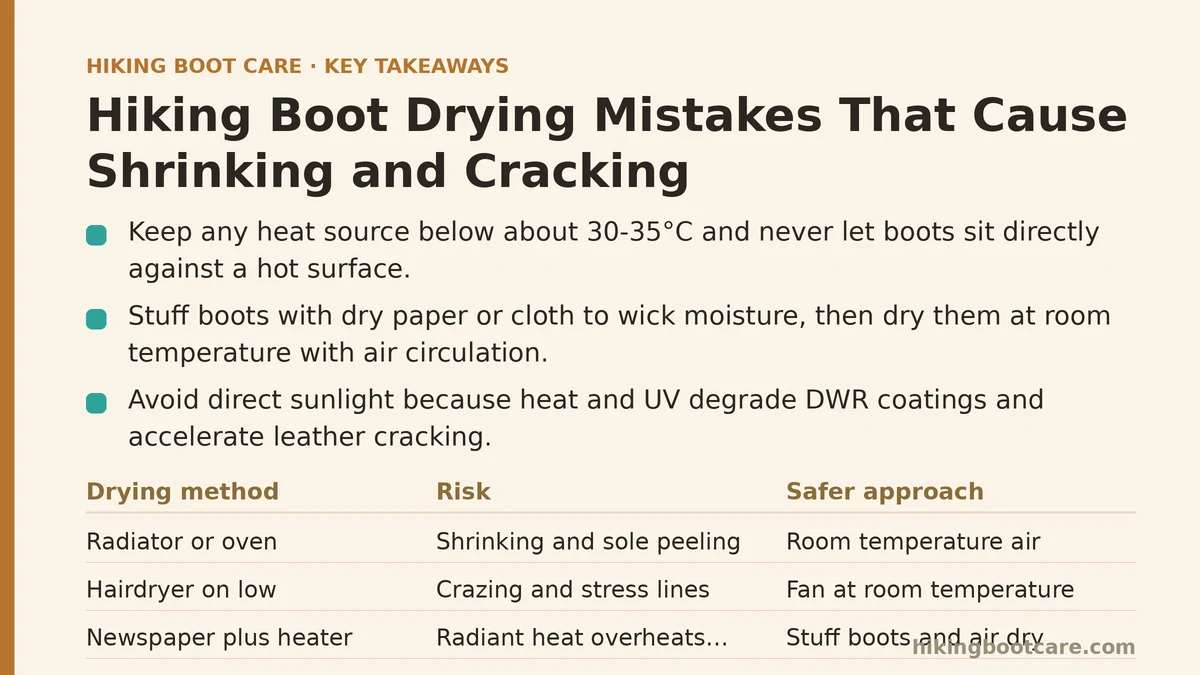
Myth: Heat Dries Boots Faster and That Is All That Matters
Reality: heat removes water quickly but also drives out the oils that keep leather supple and the plasticizers that keep rubber and foam flexible.
Leather is a network of collagen fibers held together by natural oils and fats. When you apply heat above roughly 35°C, those oils migrate and evaporate faster than they can be replenished. The fibers draw closer together as they lose moisture, and the leather contracts. This is the shrinkage you feel when a boot suddenly fits tighter across the instep. Once the oils are gone, the leather has less ability to stretch back.
Synthetic uppers behave differently but suffer the same logic. Heat softens the adhesives that bond the upper to the midsole and the midsole to the outsole. A boot dried on a radiator at 60°C for a few hours can reach internal temperatures that soften the cement bond at the rand line. The failure often shows up weeks later as a peeling sole.
Typical safe ceiling: keep any heat source below about 30–35°C, and never let a boot sit directly against a hot surface.
Myth: A Hairdryer on Low Is Gentle Enough
Reality: a hairdryer concentrates heat in one small area, and “low” on most models still delivers air at 50–60°C.
The danger with a hairdryer is not just temperature but focus. Holding the nozzle 10 cm from a toe box pushes hot air into one spot while the rest of the boot stays wet. The heated zone dries faster and shrinks relative to the surrounding material, which sets up stress lines and, on leather, fine surface cracks called crazing.
If you must use moving air, keep the dryer at least 30 cm away, keep it on the cool setting, and keep it moving constantly. Even then, a fan at room temperature is safer and does the same job over a longer window.
Myth: Stuffing Boots With Newspaper and Leaving Them Near a Heater Is Fine
Reality: the newspaper part is good; the heater part undoes it.
Packing boots with dry paper or cloth is one of the best things you can do — it wicks moisture from the inside out. The mistake is placing the stuffed boot next to a radiator, wood stove, or space heater to speed things up. Radiant heat from a stove can raise the surface temperature of leather well above 50°C even at a distance of a meter.
A better setup: stuff the boots, place them in a room at normal indoor temperature (around 18–22°C), and let air circulate. Change the paper every 2–3 hours for the first pass if the boots are very wet.
Myth: Direct Sunlight Is a Natural Way to Dry Boots
Reality: direct sun combines heat and UV, and both degrade boot materials.
UV breaks down the DWR coating on synthetic uppers and accelerates the drying and cracking of leather. A boot left on a sunny balcony for a full afternoon can hit surface temperatures of 40–50°C while also taking a UV dose that shortens the life of the waterproof membrane and the adhesives.
Shade with good airflow is the target. A covered porch or a room with a window open is fine; a south-facing windowsill in summer is not.
Myth: An Oven on the Lowest Setting Is a Safe Shortcut
Reality: ovens do not hold low temperatures reliably, and the minimum setting on many home ovens is around 65–90°C.
Even a “warm” oven setting can spike well above the safe range during preheat cycles. The result is leather that shrinks and hardens, rubber that softens and deforms, and foam midsoles that compress permanently. There is no safe oven setting for hiking boots. Treat this one as a hard no.
Myth: Sealed in a Plastic Bag With Silica Packs Is a Fast Fix
Reality: silica absorbs a small amount of ambient moisture; it cannot pull water out of saturated leather and foam.
Silica gel packets are useful for keeping already-dry gear dry in storage. They have nowhere near the capacity to dry a soaked boot overnight — a single packet holds a few grams of water at most, while a wet boot can hold 100–200 ml. Sealing a wet boot in a bag can also trap moisture against the lining and encourage mildew.
Myth: If the Outside Is Dry, the Boot Is Dry
Reality: the outer surface dries long before the lining, the insole, and the foam midsole.
A boot can feel dry to the touch on the outside while the interior is still damp. Wearing it in that state pushes moisture back into the leather from the inside and compresses damp foam, which is how midsoles lose their cushioning prematurely. Always pull the insoles out and check the lining with your hand before wearing.
The Damage Map: What Each Mistake Produces
| Drying method | Typical temperature reached | Most common damage | Time to visible damage |
|---|---|---|---|
| Radiator or space heater | 50–70°C at the surface | Leather shrinkage, rand separation | One overnight session |
| Hairdryer on low, held close | 50–60°C concentrated | Surface cracking (crazing), uneven fit | 2–3 sessions |
| Direct sunlight, full afternoon | 40–50°C plus UV | DWR breakdown, leather drying | Several exposures |
| Oven on lowest setting | 65–90°C | Permanent leather hardening, midsole deformation | One session |
| Sealed bag with silica | Room temperature | Mildew, lingering damp lining | One to two days |
| Hot car in summer | 50–60°C | Adhesive softening, warped toe box | One afternoon |
| Room temperature with airflow | 18–22°C | None when done correctly | — |
The Safe Drying Routine
- Remove insoles and laces. Both trap moisture. Set them aside to air dry separately.
- Empty and rinse. Tip out grit and mud; a quick lukewarm rinse helps the upper dry evenly.
- Blot the exterior. Press a clean towel against the upper and rand to pull surface water.
- Stuff with dry paper or cloth. Loosely packed, not crammed, so air can still move. Change the stuffing every few hours while the boot is very wet.
- Set in a well-ventilated room at 18–22°C. A fan pointed at the boots, not directly into them, speeds drying without heat.
- Stand them upright, unlaced, tongue open. This lets air reach the interior.
- Check the lining before wearing. If it feels cool and damp, give it more time.
Most soaked boots reach wearable dryness in 12–24 hours with this method. That is slower than a radiator, but it is the difference between a boot that lasts two seasons and one that lasts five.
If X, Then Y: Quick Decision Branches
- If the boot is only damp on the outside: blot and air-dry at room temperature; no stuffing needed.
- If the boot is soaked through: stuff with paper, change it every 2–3 hours, and allow 18–24 hours.
- If you need them dry in under 8 hours: use a fan at room temperature and accept that they may still be slightly damp inside; do not introduce heat.
- If the leather already feels stiff after drying: apply a leather conditioner before the next use to restore oils.
- If you see a white crust at the rand line: that is dried salt and adhesive residue; clean it gently and inspect for early separation.
- If the sole is starting to peel at the toe: stop using heat entirely and repair the seam with an appropriate adhesive before the next trip.
Recovering From a Bad Dry
If a boot has already been overheated, the damage is not always total. Work through these steps before giving up on the pair.
- Stiff or shrunken leather: clean with a pH-neutral cleaner, then apply a leather conditioner while the leather is still slightly damp. Work it in with your fingers and let it absorb for an hour. Repeat over several days. Some shrinkage reverses; some does not, and a boot that stays tight after conditioning should be retired for long hikes.
- Surface cracks: light crazing can be slowed with conditioner, but deep cracks mean the leather has lost structural integrity at that point and will tear under flex.
- Warped toe box: once the foam or leather has set in a deformed shape, it rarely returns. A warped toe box changes fit and can cause blisters.
- Peeling rand: clean the separation, apply a flexible adhesive, clamp, and cure per the product instructions. Repair early — a small peel becomes a large one fast.
Prevention Checklist for the Next Wet Trip
- Pack a small towel and a spare pair of dry socks for the drive home.
- Never leave wet boots in a hot car or sealed in a bag.
- Bring a fan or plan for a 24-hour drying window after any soaking.
- Keep a leather conditioner on hand for the day after drying.
- Inspect the rand line and seams after every heavy soaking, before storage.
What to Do Next
Tonight, before you do anything else with a wet pair: pull the insoles, stuff the boots with dry paper, and set them in the coolest well-ventilated room you have. Skip the radiator, the hairdryer, and the oven entirely. Tomorrow, check the lining by hand before wearing, and if the leather feels stiff, condition it before the next hike. That single change in routine is the most reliable way to stop shrinking and cracking before it starts.
Not sure whether a boot is recoverable after a bad drying session? Describe the material and what you see in the comments, and you will get a practical answer based on how these materials typically fail. Related guides: How to Waterproof Your Hiking Boots at Home: What Works, Your Pre-Season Hiking Boot Maintenance Checklist: What Experts Do, and Common Hiking Boot Care Mistakes to Avoid (According to What Fails).