
Say you are standing in an outdoor shop, holding two cans that cost roughly the same $12 to $18, and trying to decide which one belongs on the boots sitting in your car. One label says “spray,” another says “wax,” and a third tub on the shelf says “cream.” They all promise waterproofing. They do not all do the same job, and picking wrong can either waste your money or permanently change how your boots look.
The choice comes down to two variables: what your boot upper is made from, and how the boot is constructed underneath that upper. Here is a ranked breakdown of the three main treatment formats, from the most versatile to the most specialized.
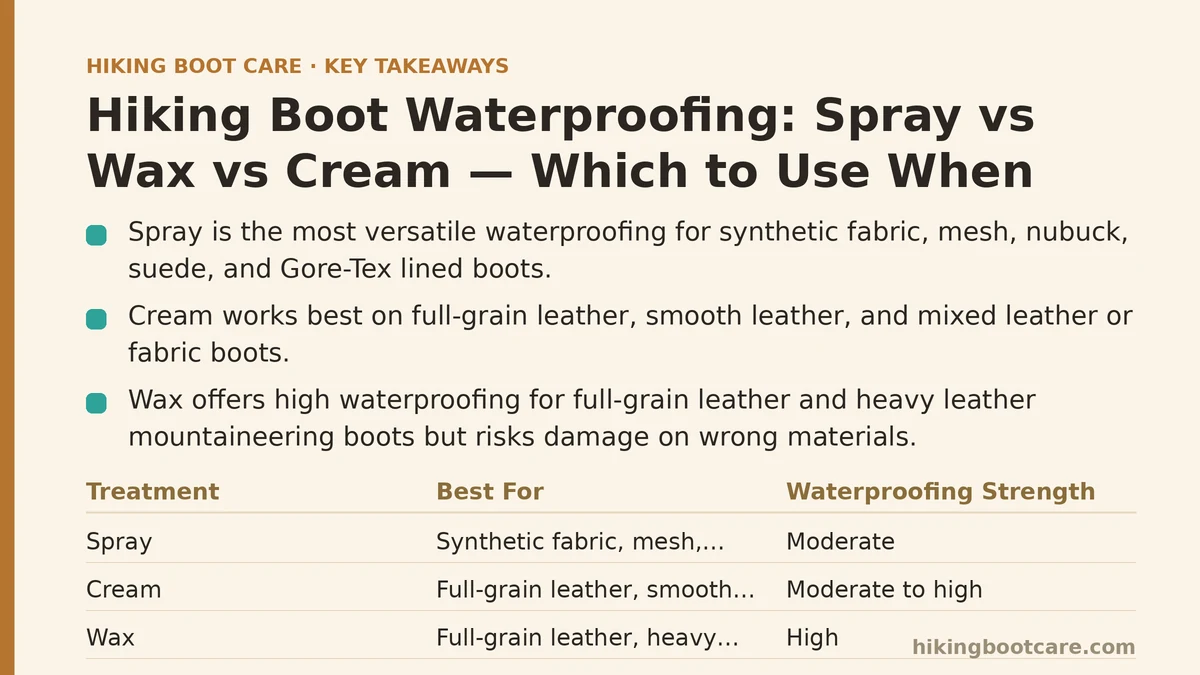
The Short Answer First
If you want to skip ahead, this table summarizes the whole decision:
| Treatment | Best For | Waterproofing Strength | Breathability Impact | Risk of Damage |
|---|---|---|---|---|
| Spray | Synthetic fabric, mesh panels, nubuck, suede, Gore-Tex lined boots | Moderate | Minimal | Low |
| Cream | Full-grain leather, smooth leather, mixed leather/fabric boots | Moderate to high | Low to moderate | Low if matched to material |
| Wax | Full-grain leather, heavy leather mountaineering boots | High | Moderate to high | High if used on wrong material |
The ranking below explains why that ordering holds up, and where each format breaks down.
1. Spray — The Most Versatile Option
Spray-on DWR treatments are the default starting point for most modern hiking boots. If your boots have any synthetic textile on the upper — mesh, ripstop nylon, textile panels, or a waterproof membrane liner like Gore-Tex — spray is almost always the correct format.
Why it ranks first: It works on the widest range of materials without altering color or texture. It penetrates fabric weaves and mesh without clogging them, which matters because synthetic uppers rely on breathability to move moisture away from your foot.
How it works in practice: The aerosol or pump spray deposits a thin polymer layer on individual fabric fibers. Water beads on treated fibers instead of spreading into the weave. This keeps the outer fabric from saturating, which is the condition that allows water to press against the membrane beneath.
Typical coverage: A 300ml can commonly covers one pair of mid-height boots two to three times, depending on how porous the upper is. Expect to reapply every 20 to 40 hours of active hiking, or sooner if you hike in abrasive terrain like scree or sandstone.
Watch for these mistakes:
- Spraying outdoors on a windy day, which wastes 30 to 50 percent of the product before it lands on the boot.
- Applying to a dry boot. Fabric fibers absorb spray more evenly when the upper is slightly damp from cleaning.
- Skipping the heat-set step afterward. Most spray treatments need 20 to 30 minutes in a tumble dryer on low heat (no higher than 40°C) or a pass with a hair dryer to bond properly.
Skip spray if: Your boots are full-grain leather. Spray sits on the surface of leather rather than soaking in, so it wears off quickly on high-flex areas like the toe box.
2. Cream — The Balanced Middle Ground
Cream treatments, sometimes labeled as leather conditioners with waterproofing, sit between spray and wax in both performance and risk. They are the best fit for boots with smooth or full-grain leather uppers, and for mixed-construction boots that combine leather panels with textile sections.
Why it ranks second: Cream penetrates leather better than spray but does not build up the thick, breathability-blocking film that wax creates. It also conditions the leather as it waterproofs, which matters because dry leather cracks under flex.
How it works in practice: You apply a small amount to a damp boot with your fingers or a cloth, working it in with circular motions. The cream carries oils and waxes into the leather’s surface layer. After about an hour, you wipe off the excess. The leather darkens slightly during application and lightens back as it absorbs.
Typical use interval: Cream treatments on full-grain leather commonly last through 30 to 60 hours of hiking before needing reapplication. This is longer than most sprays, partly because leather holds the treatment within its fibers rather than just on the surface.
Watch for these mistakes:
- Applying cream to nubuck or suede. These materials have a raised nap that cream flattens, permanently altering the finish and leaving a darkened, polished patch.
- Over-applying. Too much cream leaves a tacky residue that attracts dirt, and dirt blocks the treatment from performing.
- Using cream on boots with a fabric/Gore-Tex upper. It does nothing useful for synthetic weave and can clog mesh.
Cream is the right call when: You have leather boots that see regular three-season use and you want a middle ground between easy application and durable protection.
3. Wax — The Heavy-Duty Specialist
Wax-based treatments deliver the strongest and longest-lasting water resistance of the three, which is why they remain standard for full-grain leather mountaineering and backpacking boots. They are also the format most likely to cause damage if applied to the wrong boot.
Why it ranks last on versatility: Wax is a commitment. Once worked into leather, it is difficult to remove completely. On the wrong material, it is effectively permanent.
How it works in practice: Wax forms a physical barrier on and just below the leather surface. It repels water aggressively but also reduces the leather’s ability to breathe. On a full-leather boot in cold, wet conditions, the trade-off is usually worth it. On a synthetic boot, the trade-off is pointless because the wax does not bond to the textile at all.
Typical use interval: A single wax application on full-grain leather can hold up for 60 to 100 hours of hiking, or a full season of moderate use. That durability is the reason wax stays popular for boots that see heavy use in wet climates.
Watch for these mistakes:
- Using wax on nubuck or suede. This is the single most common and most damaging waterproofing error. Wax darkens the material permanently, mats the nap, and cannot be removed with normal cleaning.
- Applying wax to boots with Gore-Tex or similar membranes. The wax reduces the leather’s breathability, which traps moisture inside and defeats the purpose of the membrane.
- Layering wax over old spray or cream without cleaning first. The wax will not bond to a residue-covered surface and will flake off within a few outings.
How to Choose: If X, Then Y
If the boot upper is mostly synthetic textile or mesh, use a spray treatment and heat-set it after application.
If the boot upper is full-grain or smooth leather, choose between cream and wax. Use cream for regular three-season hiking and wax for sustained wet conditions, winter use, or heavy loads.
If the boot upper is nubuck or suede, use spray only. Never use wax or oil-based cream on these materials.
If the boot is a combination boot with leather toe and heel panels plus textile mid-panels, treat the leather panels with cream and the textile panels with spray. Apply the two products separately and let each dry before handling the other section.
If the boot has a waterproof membrane (Gore-Tex, eVent, or similar) and the upper is leather, choose cream over wax. The membrane already blocks water from the outside; the treatment’s job is to keep the outer leather from saturating and to preserve breathability.
Common Recovery Scenarios
“I waxed my nubuck boots and now they’re dark and flat.” The damage is often permanent, but a dedicated nubuck cleaning block or a suede brush can lift some of the nap. Do not apply more wax or cream. This is a case where the mistake cannot be fully undone.
“I sprayed my leather boots and the treatment only lasted two hikes.” This is expected. Spray does not penetrate smooth leather well. Clean the boots thoroughly and switch to cream or wax, depending on the conditions you hike in.
“My synthetic boots wet out even after spray treatment.” The DWR has probably failed at the fabric level rather than the treatment level. Deep clean with a pH-neutral cleaner to remove dirt and old residue, reapply spray while the boot is damp, and heat-set for 20 to 30 minutes.
“The treatment is flaking off.” This usually means it was applied over a dirty or previously treated surface. Strip the boot with a dedicated cleaning gel, let it dry, then reapply.
Applying Any Treatment Correctly
Regardless of which format you choose, the sequence is the same:
- Remove laces and insoles.
- Clean the boots with lukewarm water and a pH-neutral cleaner. Rinse until the water runs clear.
- Let the boots dry until they are damp but not dripping.
- Apply the treatment according to format — spray lightly from 15 to 20cm away, work cream in with your fingers, or rub wax in with a cloth.
- Heat-set if the product requires it. Low heat, 40°C maximum, 20 to 30 minutes.
- Let the boots rest for at least 12 hours before wearing them.
What to Do Next
Check the label inside your boot’s tongue or collar to confirm the upper material. If it says “full-grain leather,” buy cream or wax. If it says “textile,” “mesh,” or “synthetic,” buy spray. If it says “nubuck” or “suede,” buy spray and nothing else.
Then look at your last pair of boots. If they wet out within a day of hiking, the treatment format was probably wrong for the material. Match the product to the upper, apply it correctly with heat-setting, and test the result with a bead test before your next trip. Related guides: Common Hiking Boot Care Mistakes to Avoid (According to What Fails), How to Waterproof Your Hiking Boots at Home: What Works, and Your Pre-Season Hiking Boot Maintenance Checklist: What Experts Do.